How to connect Vidgreets with Magento
In this article we explain how to connect Vidgreets to Magento with our Magento plugin

Upload the extension
- Log into your hosting space
- Unzip extension package and upload them into Magento root directory.
- Enter the following at the command line
php bin/magento setup:upgrade
php bin/magento setup:static-content:deploy
php bin/magento cache:clean
Configuration
Go to Vidgreets > Vidgreets Video Message > General
Enable Video Message
Enable/Disable the creation of a Videomessage when the Videomessage Product is bought.
Enable Test Mode
When Test Mode is enabled the Videomessages will be created on the Vidgreets Test System. Videomessages created on this system will be deleted after a short time.
Videomessage API URL
The API URL is https://api.vidgreets.de/api/v2/ by default. This does not have to be changed as far as not instructed by Vidgreets.
Videomessage Client Key
Access credentials for the Vidgreets Video Message API
Videomessage API Key
Access credentials for the Vidgreets Video Message API
Video Message Product SKU

During installation, the Vidgreets Extension creates a product in your Magento 2 Backend. This product is used to define price and invoice name for the video message. By default, this product has the SKU “vidgreets-video-message”. If you want to change this SKU or use a self-defined product as video message you need to configurate the corresponding SKU here.
Send instuction eMail from
Here you can select how the Instruction eMail should be sent to the customer when a Videomessage is bought. Make your selection between three options:
- Don`t send eMail
No eMail will be sent to the customer - Send instruction from Vidgreets API
In this case the Instruction eMail will be sent by the Vidgreets System - Send instruction from Magento
In this case the Instuction eMail will be sent from the Magento System. This gives the option to send a customized eMail using Magento eMail Templates.
Instruction eMail Template (Applies only for sending eMails from Magento)
Select the Magento eMail Template to use if “Send instruction from Magento” was selected.
Test send eMail Template (Applies only for sending eMails from Magento)
Test send the Magento eMail to a test Mail address
The video message product
With the video message product which is created during installation by the Vidgreets Magento Extension it is possible to define the price and the product name of the video message.
Be sure to have the quantity of the product set to infinite by disabling stock management for this product.
Also make sure that the product is added to all Websites which are in use.
After a customer bought a videomessage
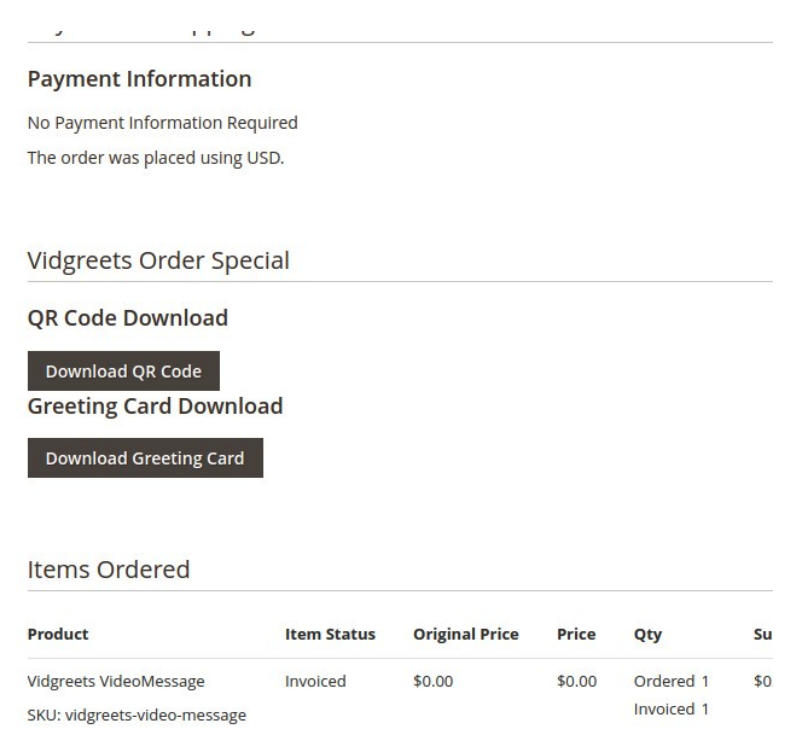
When a customer has bought a videomessage you can use the generated QR Code to add the little extra to your delivery.
You can find the QR Code and Greeting Card Print in the details view of the order like this:

